
How to install a kick plate
How to install a kick plate

Door kick plates are most commonly found on business buildings or commercial buildings, such as restaurants and coffee shops, where there is a high amount of traffic coming in and out of doors with packages and other items. When this happens and people’s hands are occupied, it’s easy to kick the bottom of the door to open it. If kick plates are installed on the door, people can kick the door open without damaging the door.
Nowadays, door kick plates are becoming more and more popular amongst residential buildings as well. Have you had your hands full of grocery bags and unconsciously kicked the door open? Then, maybe you should install kick plates on your entrance door. No more dents or scuff marks.
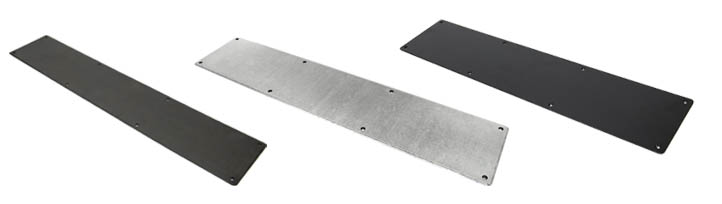
Door kick plates are not only highly functional and improve the durability of your entrance door, but can also be a decorative element for your front door. Kick plates come in a variety of finishes to complement your door or to add that pop of colour or colour contrast your door needs. For instance, our satin stainless kick plates would be ideal for dark coloured doors, such as navy-blue doors, whilst our black kick plates would look perfect on a red coloured door which had other black door furniture.
If you are still looking for a door kick plate, we would recommend some of our best-selling ones, including the 800x150mm satin stainless kicking plates, 710x150mm satin stainless kicking plates and 820x150mm satin stainless kicking plates. The following guide will help you install a kick plate on your front door effortlessly, plus it will explain how to choose the right kick plate for your door.
Materials.
- Kick plate
- Screws
- Tape measure
- Masking tape
- Pencil
- Drill
- Drill bits
Installation.
- Measure the door.
Firstly, you’ll have to measure your door to ensure you purchase the correct kick plate for your door. This is the most important step. If you order a kickplate with the exact width of your entrance door, it won’t close properly, so you will need to choose a kick plate which has at least a 2-inch width difference from your door width. This will make sure that you will have 1 inch of clearance on either side of the door.
In terms of the height of the kick plate, we would recommend leaving 1 inch at the bottom as well, however, the overall height of the kick plate depends on personal preference. Some people prefer a long kick plate, others a smaller one.
- Make a guide on your door.
You can choose to install your kick plate with the door attached but we would recommend removing the door as it will make the overall installation an easier process.
Place the kick plate on the bottom of the door. Use a tape measure to ensure you have 1-inch on either side and bottom and mark these measurements with a pencil. Line-up the kick plate with these measurements and mark the screw holes to ensure your drill holes will be in the correct position.
- Attach the kick plate.
Measure the depth of the door and place a bit of masking tape on your drill bit. This will let you know when to stop drilling to make sure that you won’t drill through the door.
Drill the holes you marked and place the kickplate’s screw holes in line with the holes you’ve just drilled. Secure the kickplate to the door with masking tape to ensure it is in place, and you can start screwing it to the door.
- Finishing touches.
Once you’ve installed the kick plate, you can hang the door back into place and test that the kick plate is in the perfect position by opening and closing the door. If your kick plate has a protective film covering it, don’t forget to peel it off.
If you have any questions regarding any of our products, feel free to contact us on 01376 557 561 or email our team at info@ironmongeryexperts.co.uk.
Disclaimer
At Ironmongery Experts we strongly advise that you always take safety precautions into consideration when undertaking a DIY project. We also strongly suggest that you closely read and follow the instructions provided by the manufacturer of any building materials, products or tools you use for your projects.
We try our best to provide clear and correct instructions within our articles, so you can easily complete any DIY project you desire. However, please note that the information we provide should only be used as a guideline and that some information within the text may not be entirely accurate.
When using our articles for information and advice, please note that is your own responsibility to determine your capabilities when undertaking and executing the task you wish to complete.
Before starting a DIY task, we strongly recommend that you educate yourself of any existing building, gas, water and electrical works regulations. We believe it is in your best interest to complete further research and/or contact the necessary professional body should you have any further concerns.
We also strongly recommend that a qualified tradesperson completes the relevant safety tests and checks on any DIY you have completed.


