
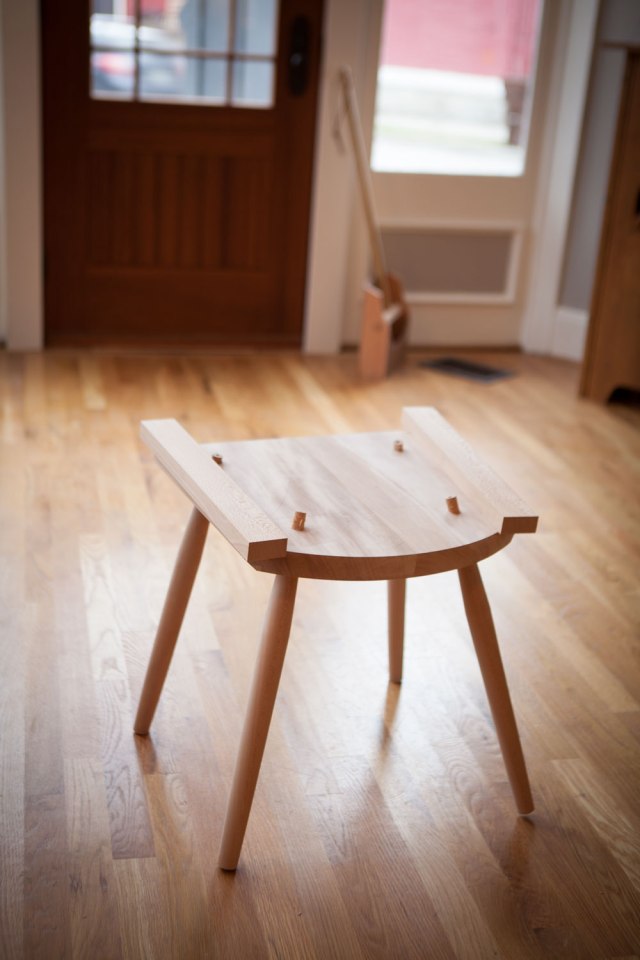
Legging up the Staked Armchair –
There are two reasons I bore and ream the mortises for a chair before saddling the seat. 1) Saddling the seat removes any spelching made by the drill bit. Or, put another way, I don’t spelch my newly saddled seat. And 2) If I mess up the boring or reaming then I haven’t wasted as much time if I’d saddled the seat.
Like many chairmakers, I use sightlines and resultant angles to bore and ream my mortises for the legs. And I’ve figured out how to do it without any trig. Or numbers. Or words. (OK, scratch the “or words.” The words and explanation are covered fully in “The Anarchist’s Design Book” </blowhard advertisement>.)
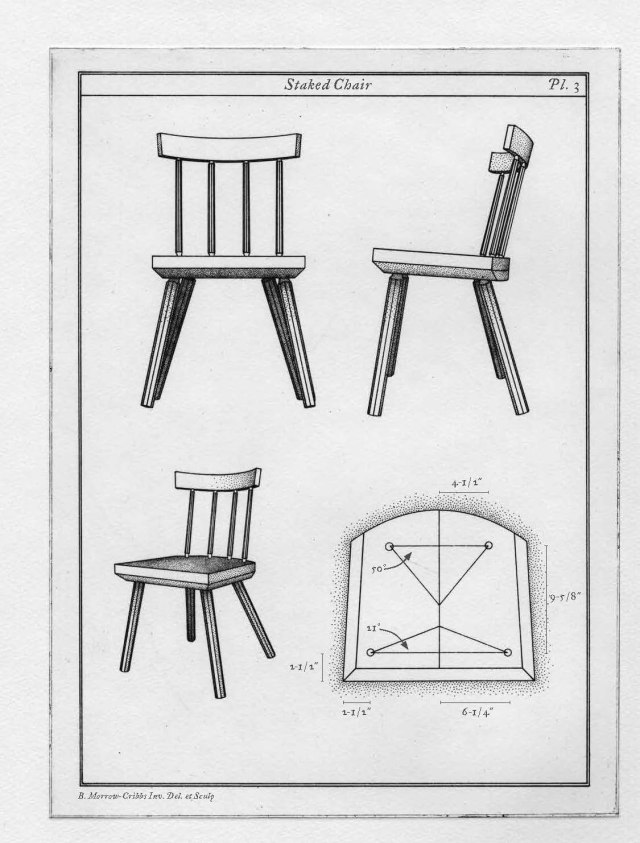
With this chair I use the same angles as the staked chair in the book. So use the drawing above to draw your sightlines and set your sliding bevel square (which Roubo calls the “false square,” which amuses me greatly, which wasn’t supposed to be amusing but is).
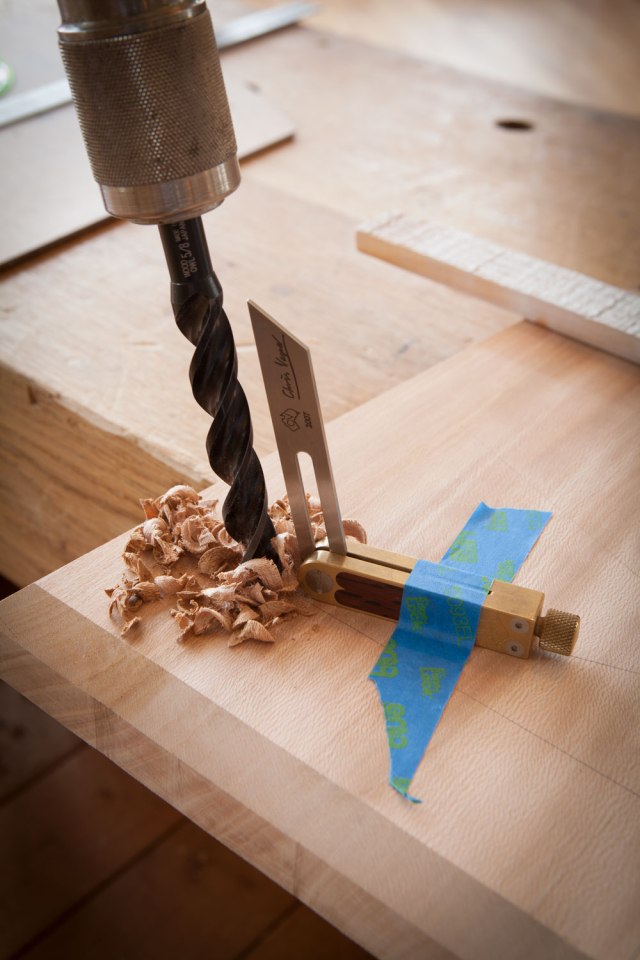
Bore the 5/8” hole for the mortises, using the sliding bevel as a guide for your bit. I put a backer board under the seat so I can bore straight through without thinking/stopping. When the shavings change color I rotate the brace twice more and pull out.
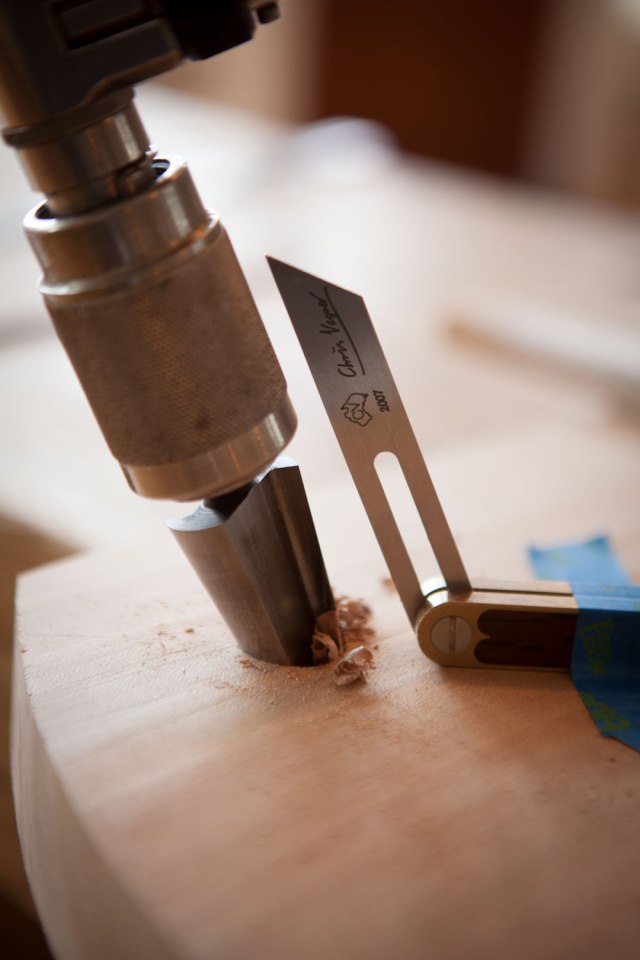
Reaming is similar. But instead of using the bit as a guide for the bevel square, I use the shell of my chuck. This is why I love the chuck of my Yankee brace. It is a straight cylinder. Some chucks are fancy shaped like a baluster. They’re pretty, but they are no help when reaming.
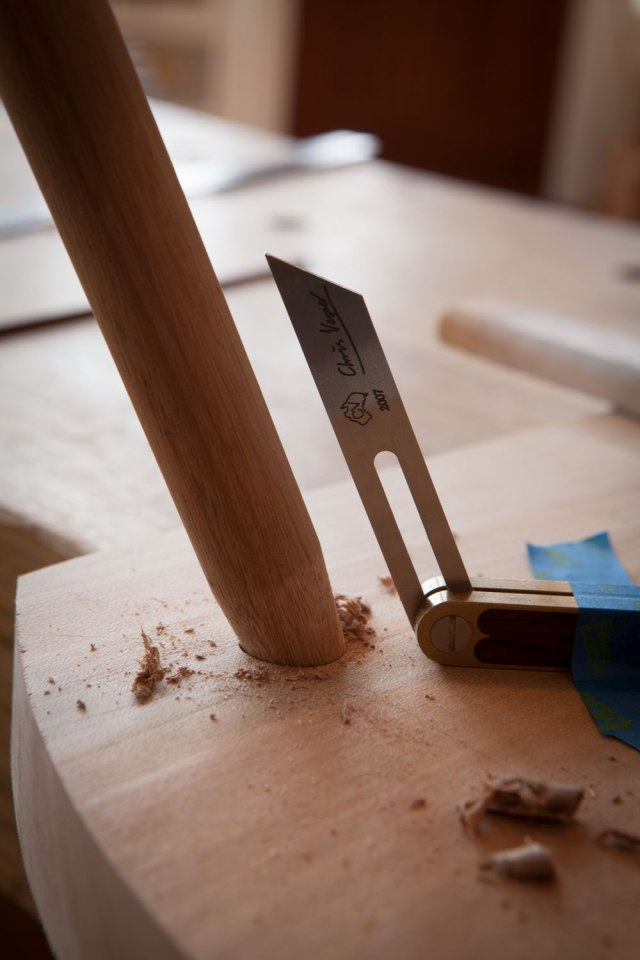
Ever four turns or so, I pull out and check my angle using a dowel with a tapered tenon on the end. I can’t check my work (easily) using the actual legs because they are all kinds of tapered.
Then I drive all four legs into their mortises, stand back and make sure the whole thing doesn’t look like a bandy-legged goat.
And only then do I start to saddle the seat.
— Christopher`Schwarz


